How to Install Synthetic Turf: A Step-by-Step Guide
If you are researching how to install synthetic turf, you are likely tired of mowing, watering, and patching dead grass. Natural lawns demand constant work. In coastal areas like Longs, SC, heat and heavy rain can make it even harder to maintain a clean, green yard.
Understanding how to install synthetic turf correctly can save you time, reduce water bills, and give you a lawn that looks sharp all year. The key is following each step of the synthetic turf installation process carefully. Skipping steps or rushing the base work often leads to uneven spots, drainage problems, or visible seams.
This guide walks you through every stage, from planning and site preparation to infill and final grooming. Whether you are considering DIY synthetic turf installation or simply want to understand the artificial grass installation steps before hiring a professional, this synthetic turf installation guide will give you clarity.
Why Homeowners Choose Synthetic Turf
Before diving deeper into how to install synthetic turf, it helps to understand why so many homeowners are replacing natural grass.
- No mowing
- No watering
- No fertilizing
- No muddy patches
- Green appearance year round
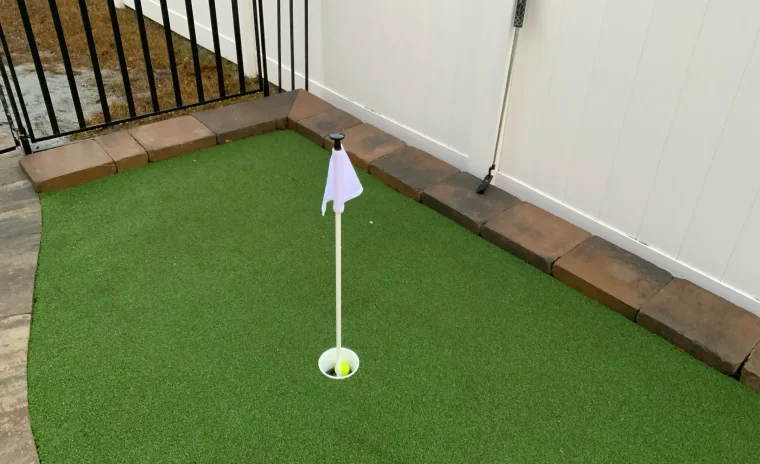
Synthetic turf installation makes sense for busy families, pet owners, and homeowners who want a cleaner outdoor space. It works well in backyards, side yards, dog runs, and even custom putting greens.
It also pairs naturally with hardscape features. Turf installed next to patios, seating walls, and patio walkways creates a defined and organized yard. Many homeowners combine turf with hardscaping or a full landscape installation services project for a balanced outdoor layout.
Still, the long-term performance depends entirely on how well you follow the synthetic turf installation process.
Step 1: Plan and Measure the Area
Every successful synthetic turf installation starts with careful planning. Rushing this stage often leads to wasted material or visible seams.
Measure the Space
- Measure length and width
- Account for curves and edges
- Add extra material for trimming
Take accurate measurements of the space where you plan to install turf. Turf typically comes in rolls that are 12 to 15 feet wide. If your yard is wider than a single roll, you will need seams. Planning seam placement in less visible areas improves the final look.
Sketch the layout. Mark trees, garden beds, irrigation heads, and borders. Clear planning makes the artificial grass installation steps much smoother later.
Evaluate Drainage
- Identify low spots
- Check slope away from home
- Look for pooling water
Proper drainage is one of the most critical parts of learning how to install synthetic turf. If water currently collects in your yard, it must be corrected before installing turf. Synthetic turf drains well, but only if the base allows water to flow through and away.
Step 2: Remove Grass and Excavate
The next stage in this synthetic turf installation guide is removing existing materials.
Remove Existing Sod
- Cut and remove grass
- Remove roots and organic matter
- Clear debris
All grass and root systems must be removed. Leaving organic material behind can cause future settling or uneven spots. The goal is to create a clean, stable starting surface.
Excavate the Area
- Dig down 3 to 4 inches
- Go deeper for high traffic areas
- Create room for base material
Excavation depth depends on how the space will be used. For a simple lawn area, 3 to 4 inches is typical. For putting greens or heavy-use spaces, deeper excavation may be needed. This step is foundational in the synthetic turf installation process.
Step 3: Install a Stable Base
The base determines how your lawn will look and perform years from now.
Lay Weed Barrier Fabric
- Install landscape fabric
- Overlap seams
- Secure it in place
A weed barrier helps prevent growth under the turf. It also separates the soil from your aggregate base, which supports long-term stability.
Add Crushed Stone or Road Base
- Spread 3 to 4 inches of crushed stone
- Avoid loose sand alone
- Grade evenly
Use crushed stone or a class II road base. This material compacts tightly and drains well. Spread it evenly across the excavated area.
Compact in Layers
- Use a plate compactor
- Lightly moisten base
- Check slope as you compact
Compaction is one of the most important artificial grass installation steps. Compact the base in layers to prevent future sinking. The surface should feel firm and smooth, almost like concrete when finished.
Step 4: Install Edging for Structure
Edging defines the lawn and holds the turf in place.
- Aluminum edging
- Steel edging
- Concrete borders
- Paver borders
Edging should sit flush with the final turf height. Secure it firmly into the ground before laying turf. Without proper edging, the perimeter can shift over time.
Many homeowners integrate turf alongside landscape curbing installation to create clean lines between lawn and garden beds.
Step 5: Roll Out and Position the Turf
Now the project starts to look like a lawn.
Let the Turf Relax
- Unroll the turf
- Let it sit in the sun
- Allow wrinkles to settle
Giving the turf time to relax makes trimming easier and improves alignment.
Align the Grain Direction
- Check blade direction
- Keep all sections facing the same way
- Ensure consistent appearance
Synthetic turf has a grain. Install all pieces facing the same direction for a uniform look. This detail matters in both professional and DIY synthetic turf installation projects.
Step 6: Seam Multiple Sections
If your yard requires more than one roll, careful seaming is critical.
- Trim edges cleanly
- Place seam tape beneath
- Apply turf adhesive evenly
- Press edges together firmly
Avoid overlapping the edges. The blades should meet closely without gaps. Place weight along the seam while the adhesive cures. Poor seam work is one of the most common issues in the synthetic turf installation process.
Step 7: Secure the Turf in Place
After alignment and seaming, secure the turf.
- Place landscaping nails along edges
- Nail every 4 to 6 inches around perimeter
- Secure every 12 to 18 inches across the field
Drive nails just below the surface of the backing. Avoid crushing the blades. Proper fastening prevents ripples and shifting over time.
Step 8: Apply Infill
Infill gives the turf weight and support.
- Spread silica sand or rubber infill
- Use a drop spreader for even coverage
- Apply in layers
Once spread, use a stiff broom or power brush to work the infill down into the fibers. Brush against the grain to help blades stand upright. Infill improves durability, drainage, and appearance. It is a crucial part of the artificial grass installation steps.
For pet friendly areas, choose an infill designed to manage odor and moisture effectively.
Step 9: Final Grooming and Inspection
The final stage of how to install synthetic turf involves careful inspection.
- Trim excess edges
- Brush entire surface
- Hose lightly to remove dust
- Walk the area for soft spots
If you notice uneven areas, lift the turf and correct the base before finishing. A well-installed lawn should feel firm, level, and secure.
Common DIY Synthetic Turf Installation Mistakes
Many homeowners attempt DIY synthetic turf installation. Some achieve good results. Others run into preventable issues.
- Skipping proper compaction
- Using the wrong base material
- Ignoring drainage
- Cutting seams unevenly
- Applying too little infill
Each of these mistakes affects the final appearance and lifespan of the lawn. Following a clear synthetic turf installation guide helps reduce risk.
Where Synthetic Turf Works Best
Synthetic turf fits naturally into many outdoor layouts.
- Backyard play areas
- Pet runs
- Putting greens
- Between pavers
- Around outdoor kitchens
It softens the look of stone patios and complements features like outdoor kitchen installation, fire pit installation, and retaining wall installation. When combined with thoughtful landscape design, turf helps create a clean, organized outdoor living space.
Final Thoughts on How to Install Synthetic Turf
Learning how to install synthetic turf takes patience and attention to detail. The most important parts of the synthetic turf installation process are excavation, base preparation, compaction, and drainage. If those steps are done correctly, the remaining artificial grass installation steps become much easier.
Whether you choose DIY synthetic turf installation or hire a professional, understanding how to install synthetic turf helps you make informed decisions and avoid shortcuts that lead to costly repairs later. A properly installed lawn can last for many years with minimal maintenance.
If you would rather trust the installation to a licensed and insured outdoor living contractor, we are here to help. At Castlerock Outdoor Creations, LLC, we install synthetic turf for residential properties in Longs, SC and across North and South Carolina. We focus on reliable workmanship, clear communication, and lasting results. Call (843) 855-0292 for a free estimate and ask about our military, first responder, and teacher discounts.